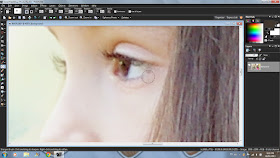
Here's a little step by step with Corel Paint Shop Pro, this photographer's editing software of choice.
Here's my original image, with one of my very fave little models.
Typically, I start by adjusting the curves. I wanted this backlit, golden-hour shot to feel a bit blown out (as is the case with most of my work). Most of the time that means nudging the very top of that curve down vertically some. This keeps the hot-spots to a minimum as I lighten the entire image.
The focal point of this image is this lovely lady's profiled face. Selecting my burn tool. I emphasize the darkest parts of the eyes and just add a bit more contrast to the lashes and brow.
Same deal with the dodge brush. I also highlight the lips to make them even poutier. (I learned that trick as a teenager reading Mademoiselle magazine. Who knew learning to apply make-up would serve me later? - said the girl who never wears make-up.)
Then I carefully come in with the sharpen tool on the eyes. Carefully. Because less is more. I just want the lashes a little more defined and the catch light in her eyes to stand out a little more.
If you noticed my original, one of the flowers on her headband is backwards. Scouting through other shots from the session, I found a little something to copy and paste, making sure the light was coming at the new element the correct way. This is why you never should discard images from your session until you've done editing all the best pics from it.
Looking for an old-school glass lens effect, I duplicated my layer and applied a minimal radial blurr to the shot.
I erased what I didn't want blurred. To keep this looking as organic as possible, I use my eraser at the largest size I can for the job and at a hardness and step of 0.
After that I added my standard overlay and voilà!
Hope you enjoyed watching me at work!


LOVE!
ReplyDeleteMy Hadassah so pretty!!!
ReplyDelete